
Following our SAP RAP series, where we built managed and unmanaged RAP applications, we published their respective service bindings and previewed the apps. However, the URLs we used were for development, not for end-users.
Both applications were published locally, so to make them accessible to your end-users, you need to deploy them.
For this exercise, we will deploy the Bank Management app that we built in this tutorial: SAP RAP Unmanaged Scenario with EML: Implement CUD on Standard BO.
We'll use SAP Business Application Studio (BAS) for the deployment process, and the final application will be added to a site created in SAP BTP Work Zone. This site functions like an SAP Fiori Launchpad, where all deployed applications are made available for end-users.
Since we've already built two RAP apps, you likely have some roles for the BTP ABAP environment. Now, we'll need a few more for the deployment process itself.
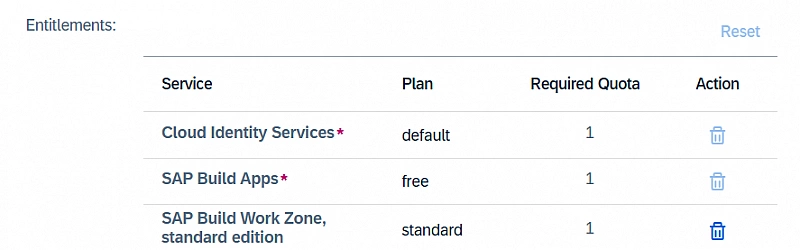
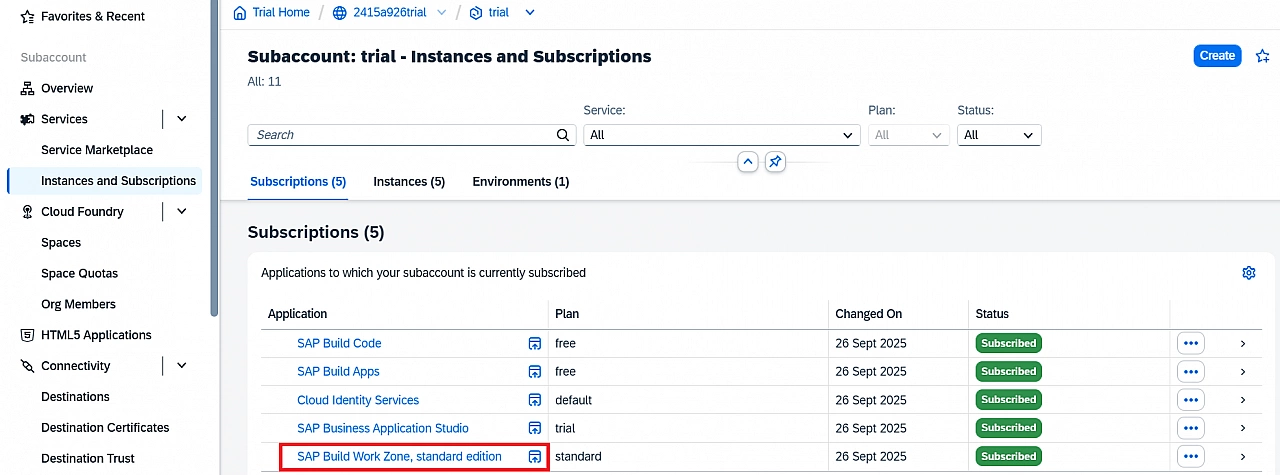
You will need to use three key SAP BTP services:
-
Cloud Identity Services
-
SAP Business Application Studio (now part of SAP Build Apps)
-
SAP Build Work Zone, standard edition
Setup SAP Build Work Zone And SAP Build Apps Service
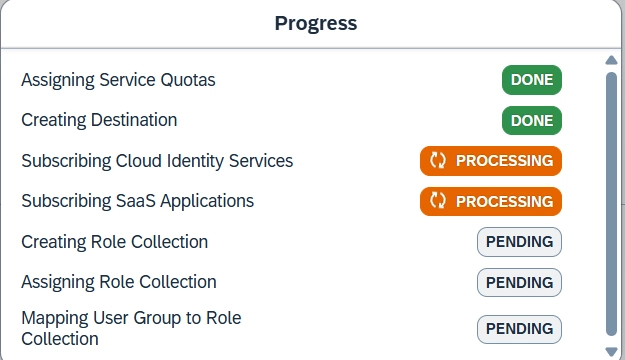
To speed up the setup, follow the steps in this video tutorial by SAP: Set Up SAP Build Apps on an SAP BTP Trial Account. It shows you how to subscribe to SAP Build Apps using a booster, which automates multiple configuration steps.
You only need to follow the tutorial until the services are available for use.
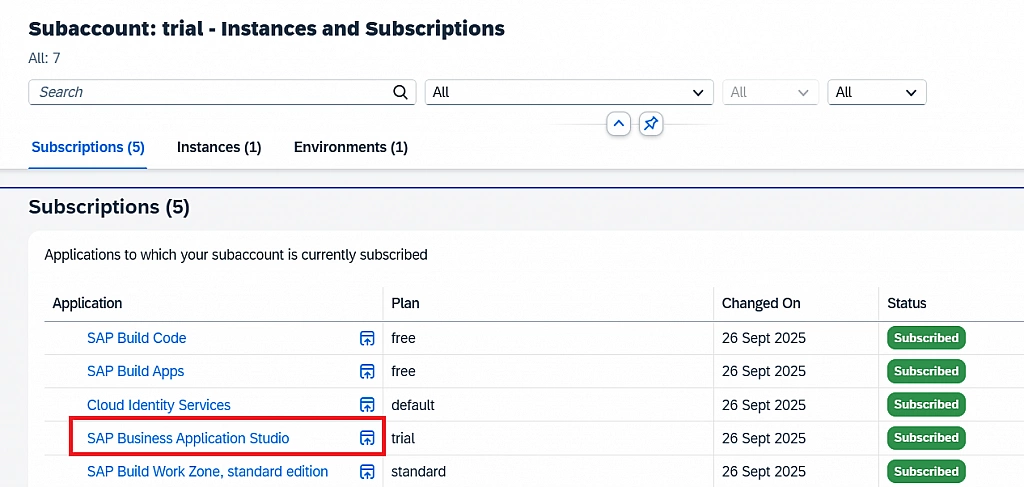
After following above steps, if you can't find SAP Business Application Studio (BAS) under Subscriptions, you can subscribe to it separately from the Service Marketplace.
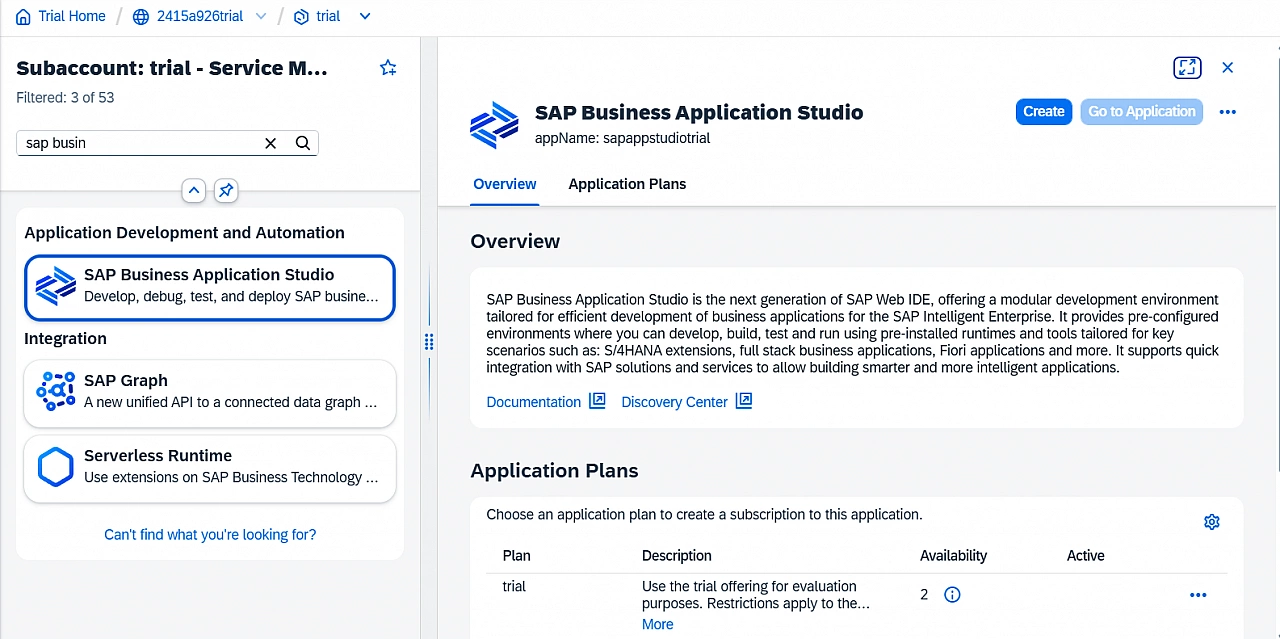
Once it's available, click on the SAP BAS service link. If you get an authorization error, make sure you have the "SAP Business Application Studio Developer" role assigned to your user.
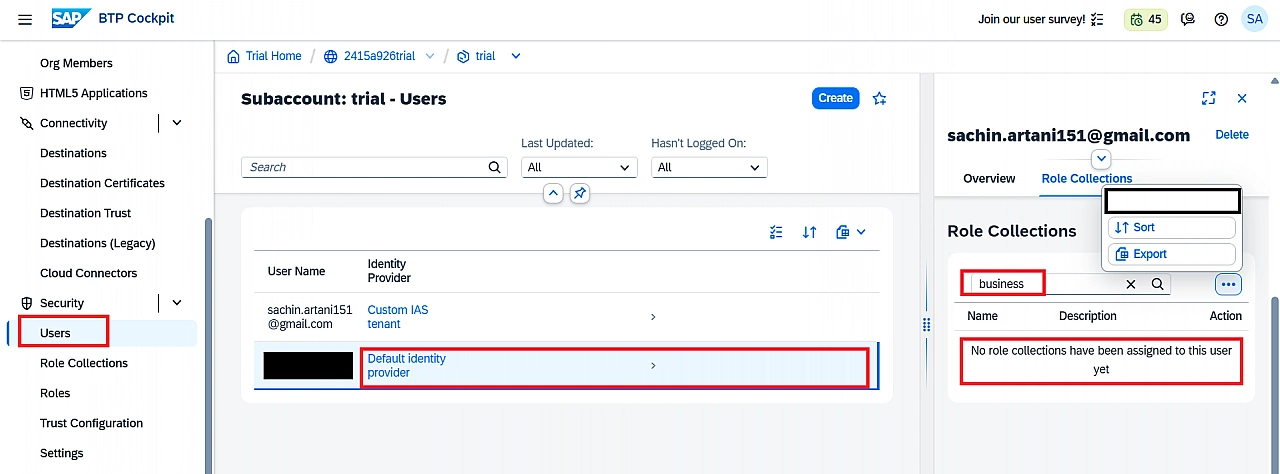
Assign the Business_Application_Studio_Developer and Launchpad_Admin role collections to your user.
If you still get an authorization error, try logging out, grabbing a cup of tea, and logging back in. It worked for me!
Now that our setup is ready, let's follow the steps to deploy the Bank Management app we built.
SAP Fiori Launchpad deployment from BAS
First, open the SAP BAS application from your BTP Cockpit.
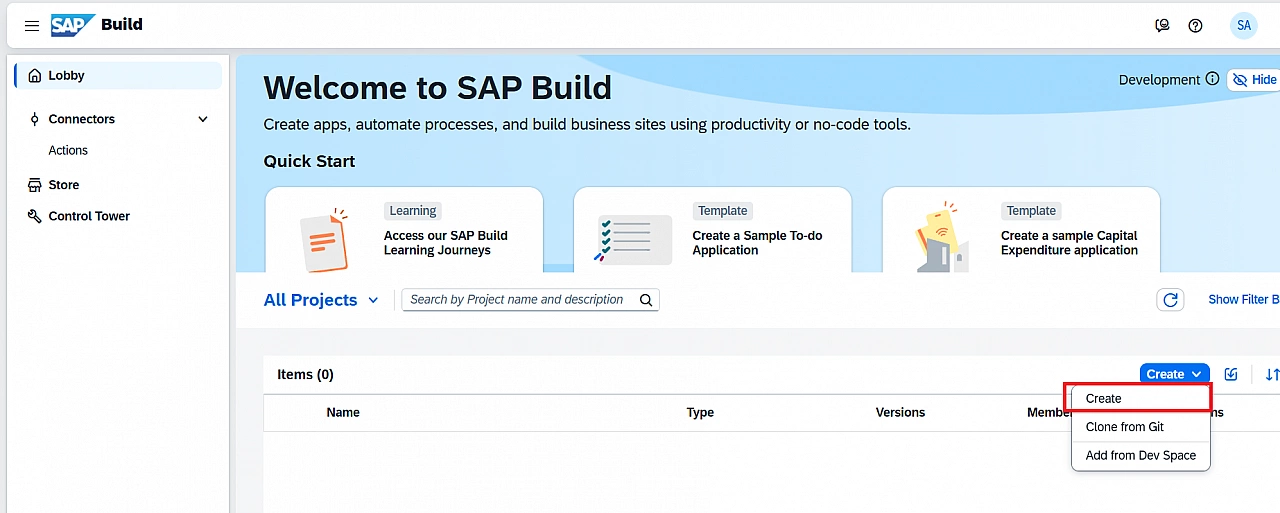
You'll be redirected to SAP Build since SAP BAS is now a part of it. Click on Create to start a new project.
Choose Application and click Next.
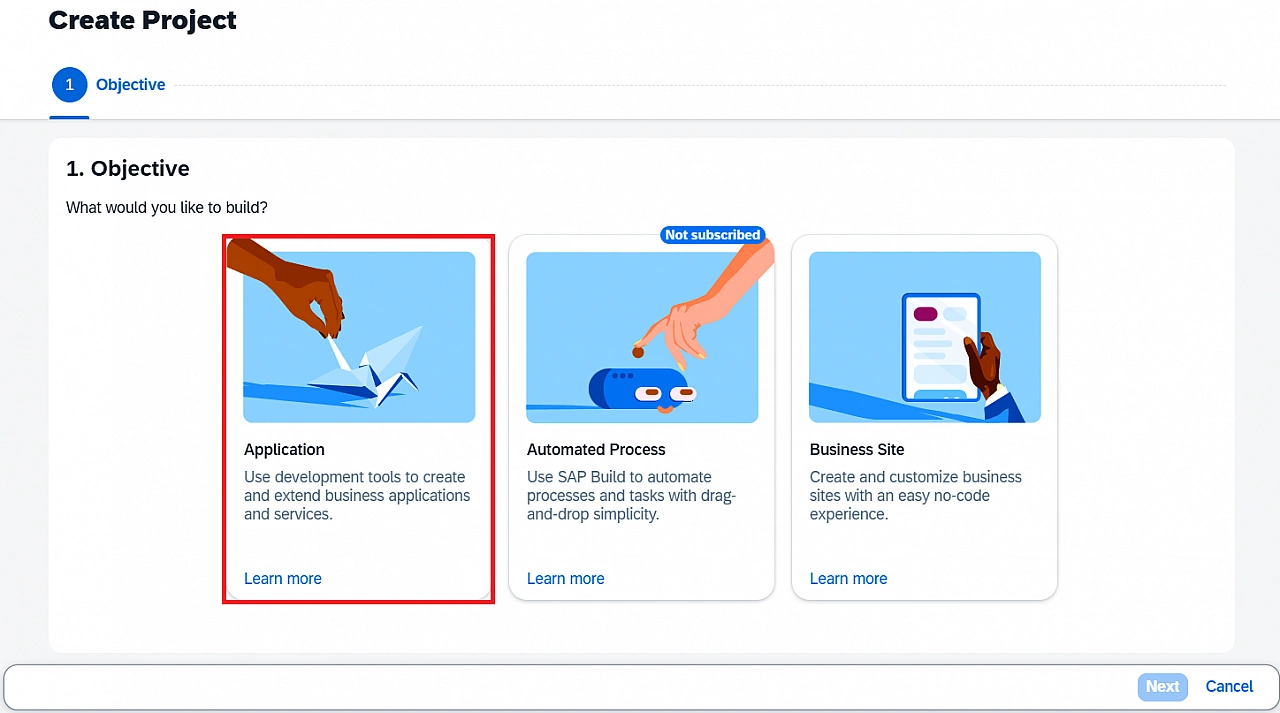
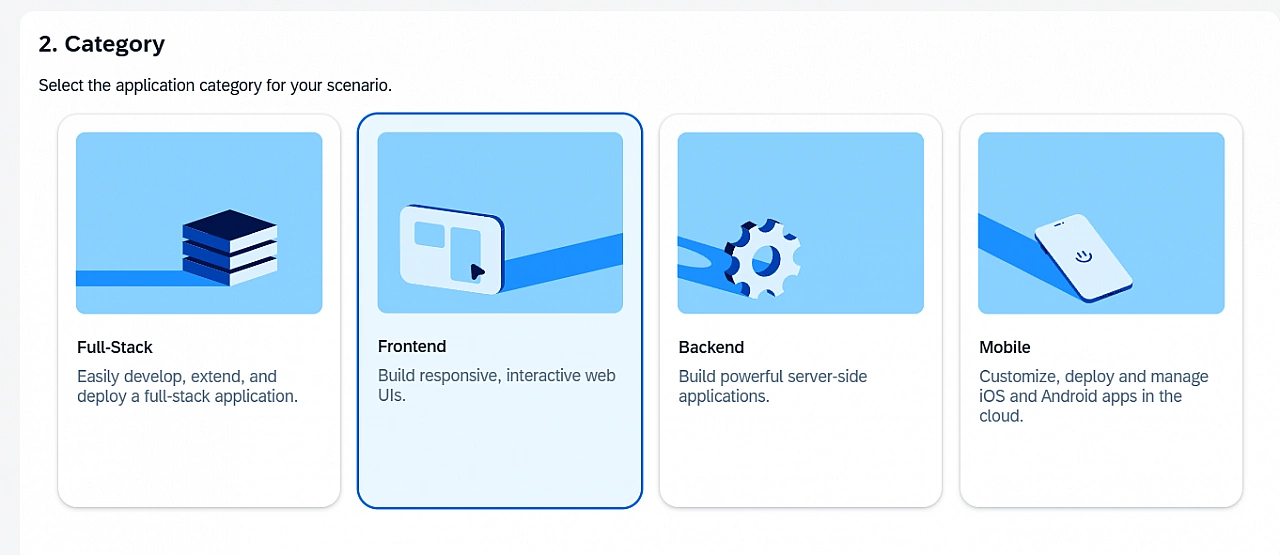
Select Frontend as the category and click Next.
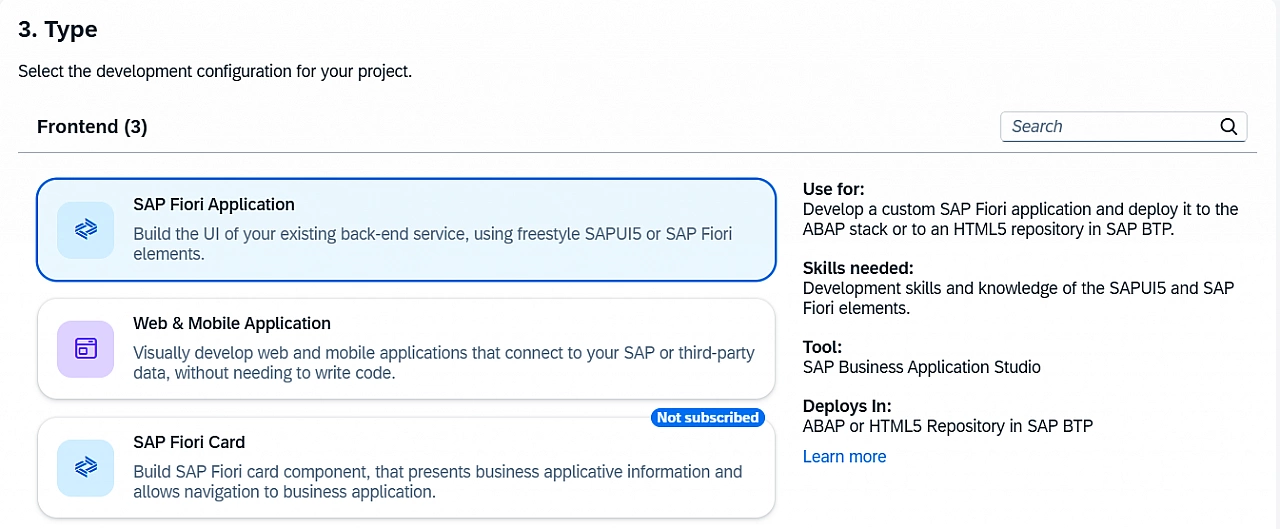
Choose the type SAP Fiori Application, give your project a name, and the Dev Space name will be auto-populated. Click on Review & finally Create.
It might take a few minutes to create the Dev Space.
A dev space is a pre-configured development environment with the tools and extensions needed for a specific scenario. In our case, since we chose to create a frontend application, all the required tools and libraries will be pre-installed. You can always install more libraries or extensions later.
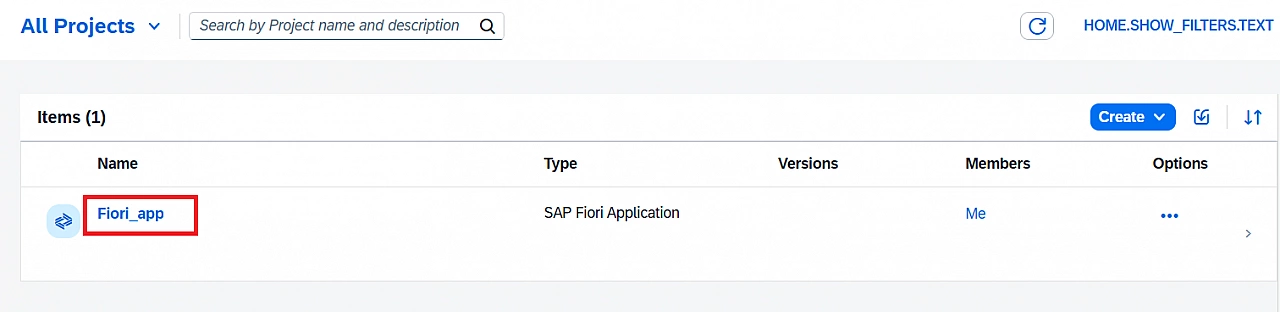
Once the project is created, you can navigate to it to open SAP BAS.
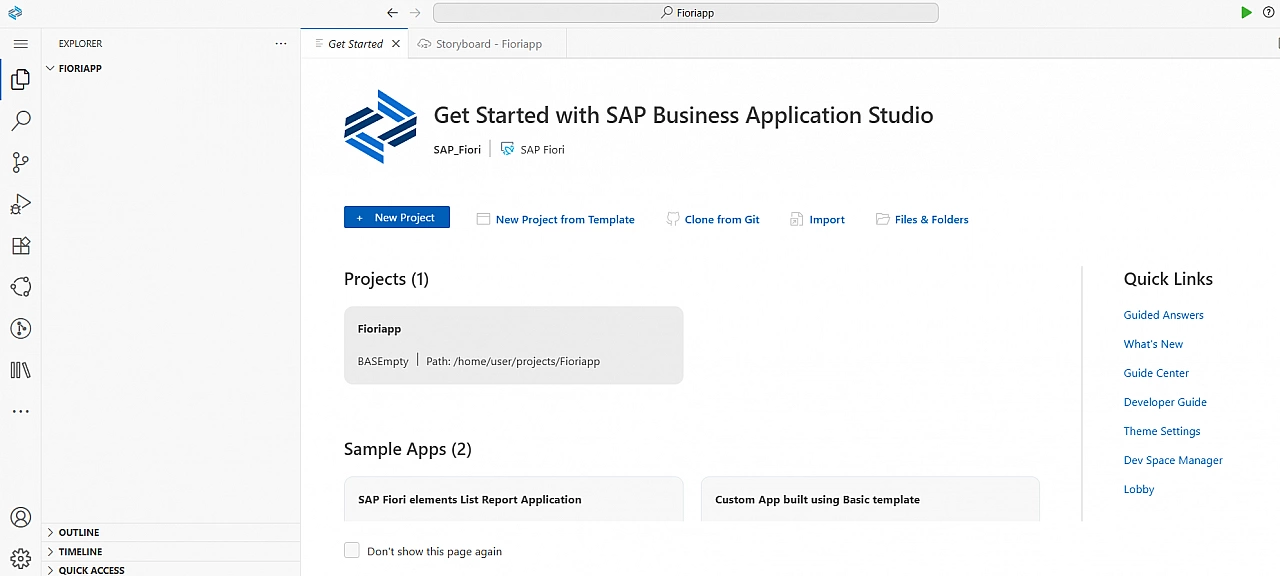
Welcome to the SAP BAS tool!
We will deploy our application to Cloud Foundry, so we need to log into it through BAS.
In the search bar at the top, type >cf:login to cloud foundary and press Enter.
Log in using the same credentials as your SAP account or through an SSO passcode. If it doesn't work, I recommend resetting your SAP account password.
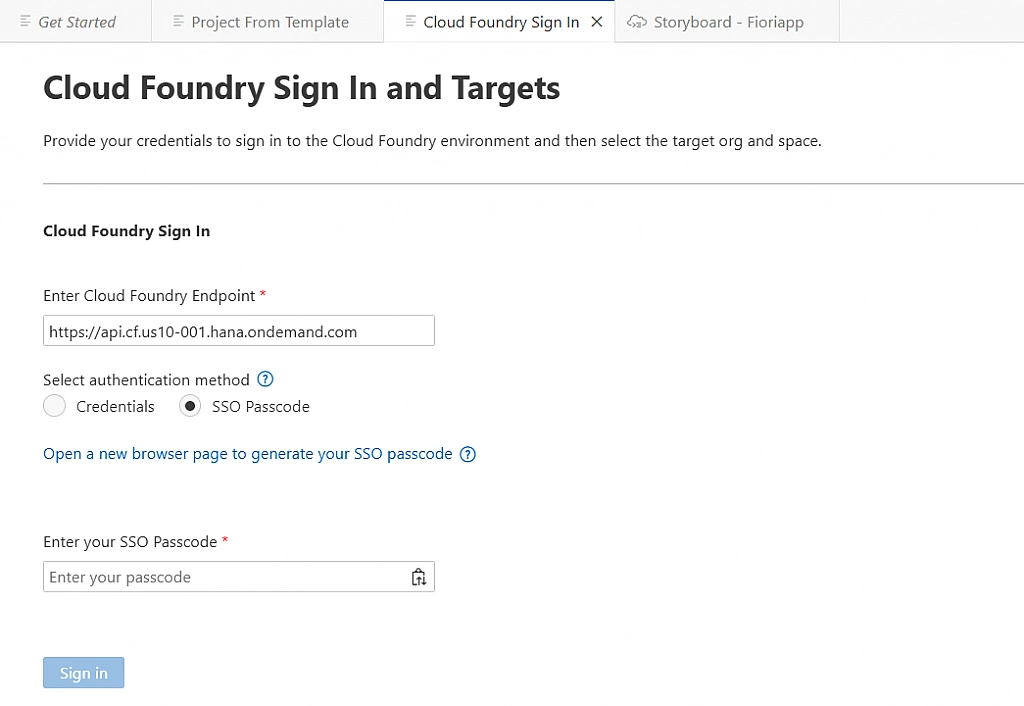
In the Cloud Foundry Target, keep the default organization and space names and click Apply.
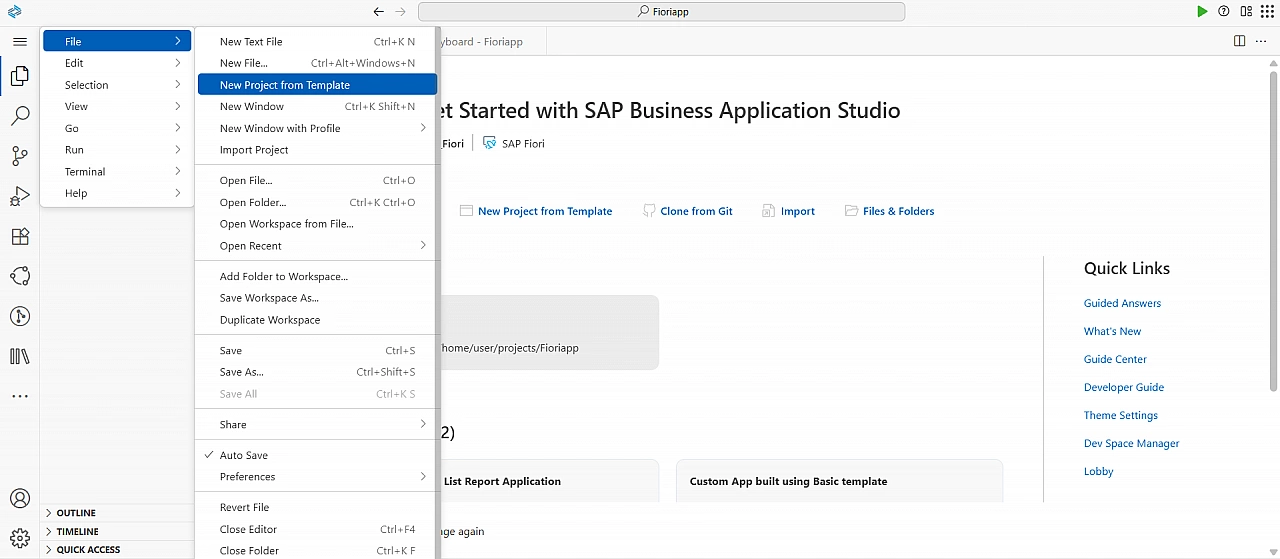
Since we're deploying a pre-built RAP app, we will create a new project using a template. Go to Menu > File > New Project from Template or, in the top search bar, type >Fiori: Open Application Generator and press Enter.
Choose the SAP Fiori Generator and then List Report Page, Click Next.
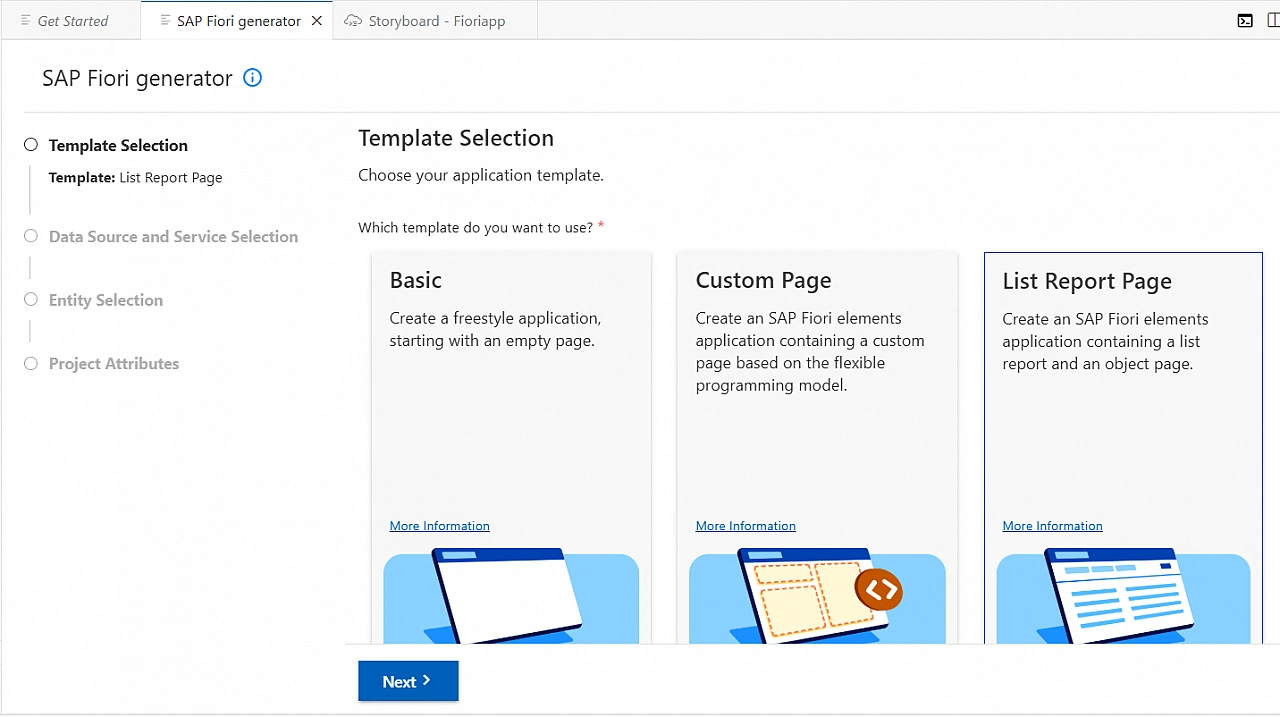
Why a List Report? Because all RAP applications use List Report Fiori templates.
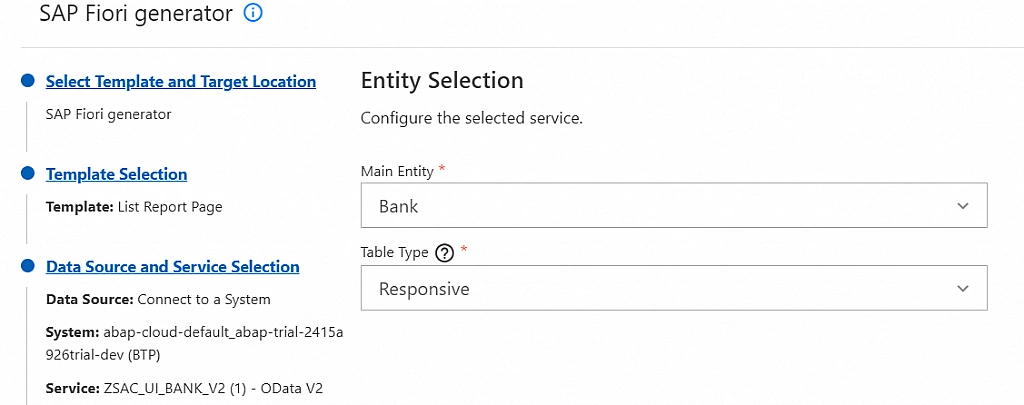
In the Data Source and Service Selection section, choose the service binding you created and click Next.

Keep the Entity Selection intact.
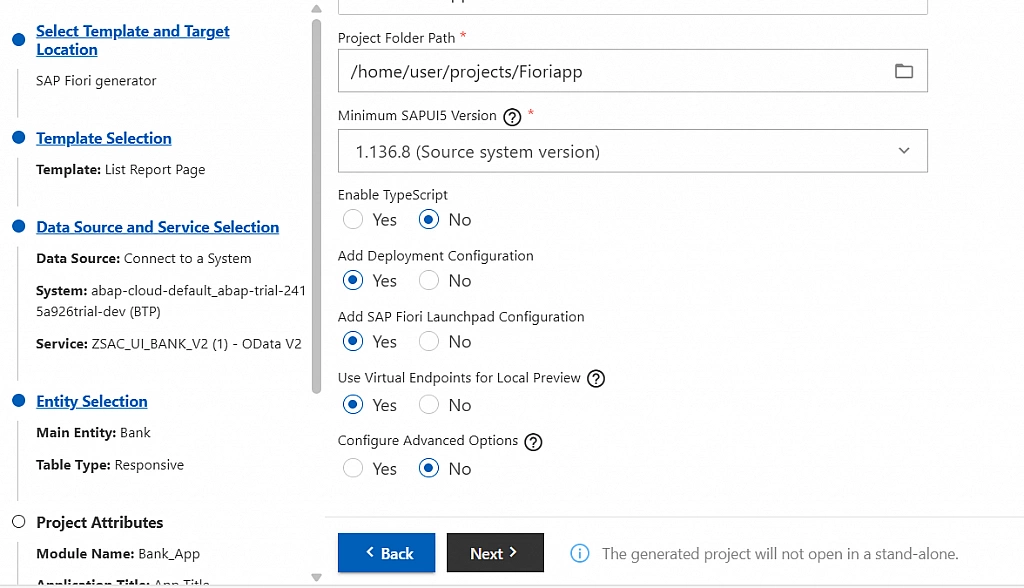
Now for a very important part. Enter a Module Name and Application Title, and keep track of the Project Folder Path. Most importantly, make sure to enable Add Deployment Configuration and Add SAP Fiori Launchpad Configuration.
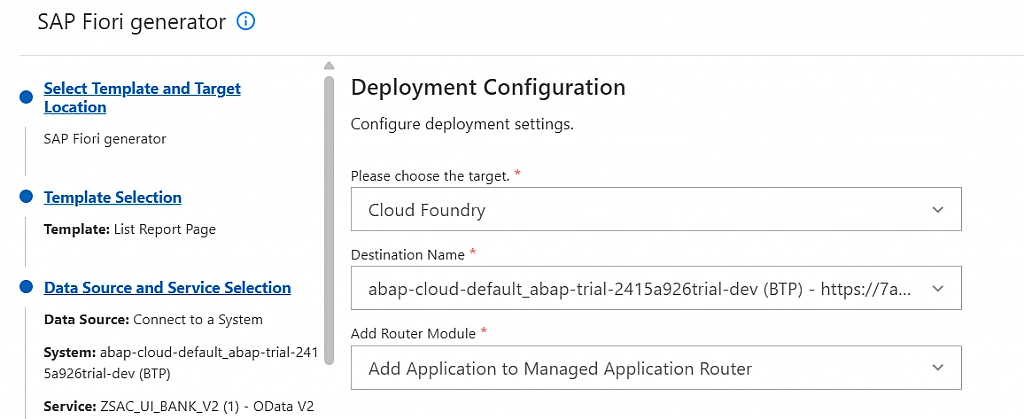
In the Deployment Configuration, choose Cloud Foundry as the target and the router module as shown below.
In the SAP Fiori Launchpad Configuration, enter a Semantic Object and Action (they can be anything), then click Finish and wait a few seconds.
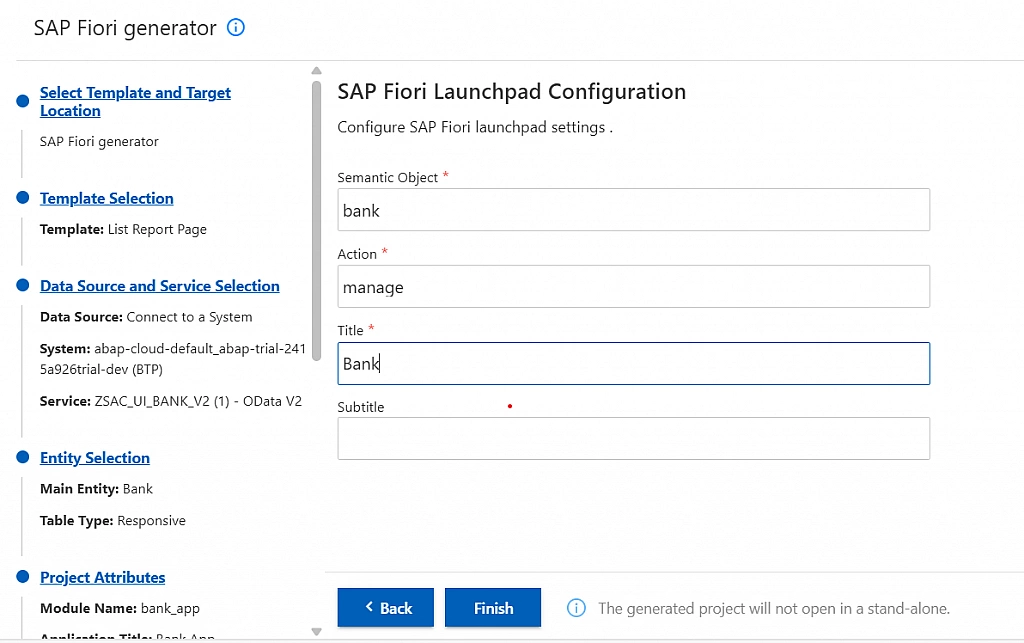
Without the Semantic Object and Action, your app won't be fully integrated with the SAP Fiori Launchpad. The Launchpad uses this information to create a unique link, allowing users to find and launch your app from a tile or through search. Without it, the deployed app exists but is not easily accessible to end-users.
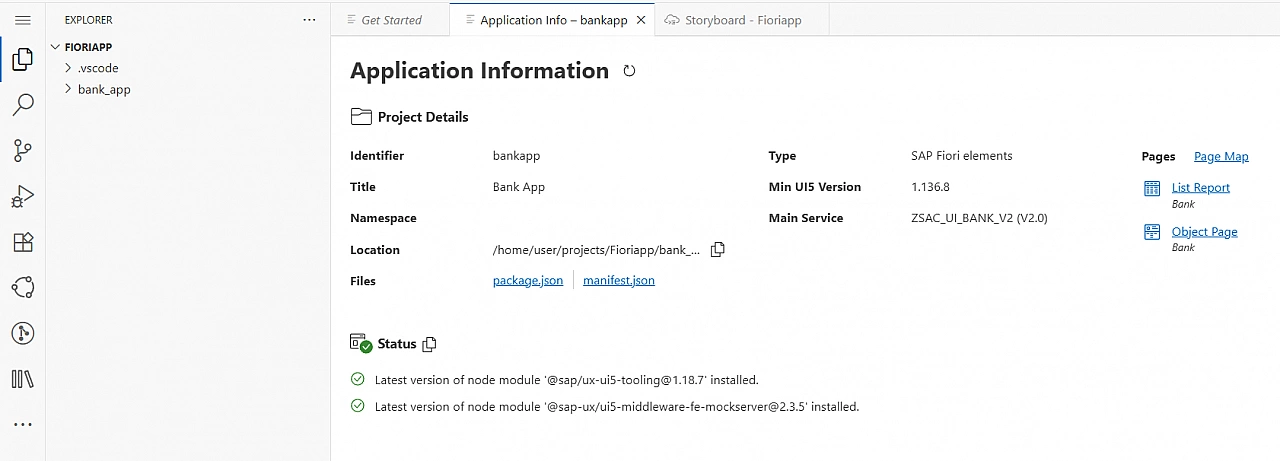
You have successfully created a Fiori project in SAP BAS!
In the top search bar, type >Terminal: Create New Terminal to open the terminal. Once it's open, navigate to your project folder and run the command: npm run start

This will preview your app in a new window, validating that everything is configured correctly.
Next, right-click on the mta.yaml file in the file structure and click on Build MTA Project. Once the commands finish executing, you'll see a new folder called mta_archives with an MTAR file inside. This is the file we will use to deploy our app.
Open a new terminal, navigate to your project folder, and run the command: npm run deploy
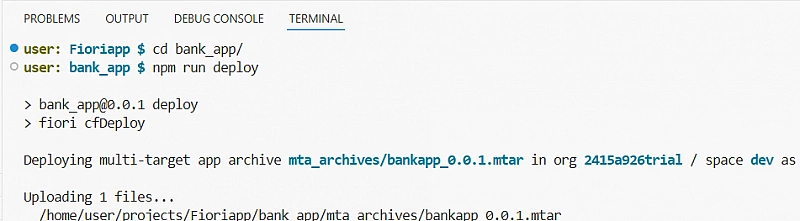
MTA stands for Multi-Target Application. It's a way to package multiple application modules and resources (like your UI and backend) into a single file. This file, the MTAR, ensures that all parts of your app are deployed together in the correct order, making the deployment process consistent and reliable.
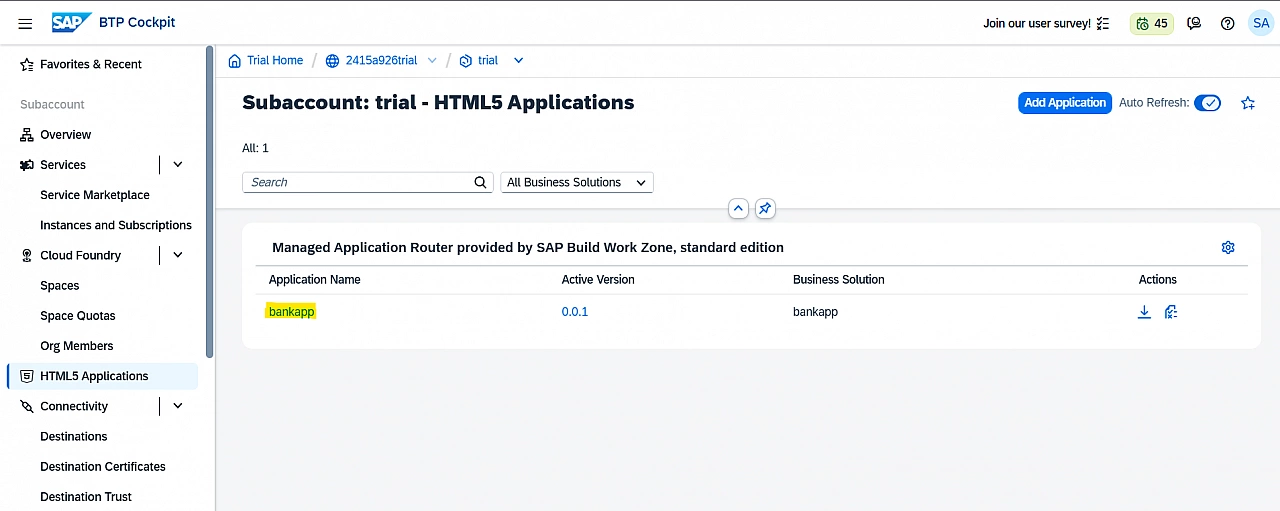
Once the command is executed, your deployment is successful! Head back to your BTP cockpit and check under HTML5 Applications. Our deployed app should now be listed there.
Assign Deployed App to SAP Build Work Zone
Now it's time to put SAP Build Work Zone into action. Open the app.
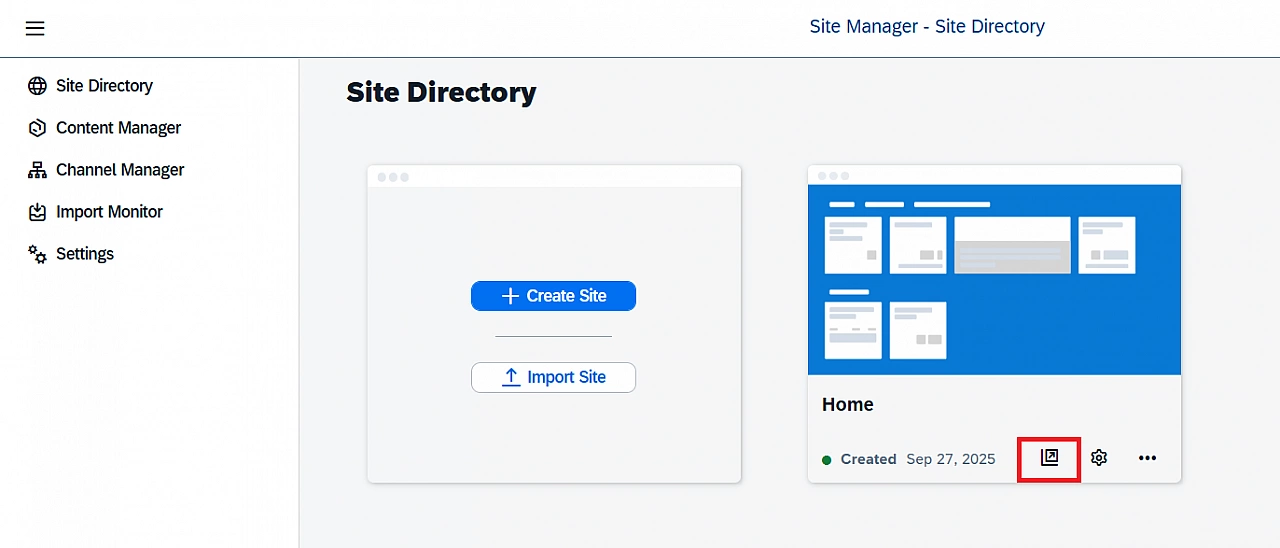
Create a new site.
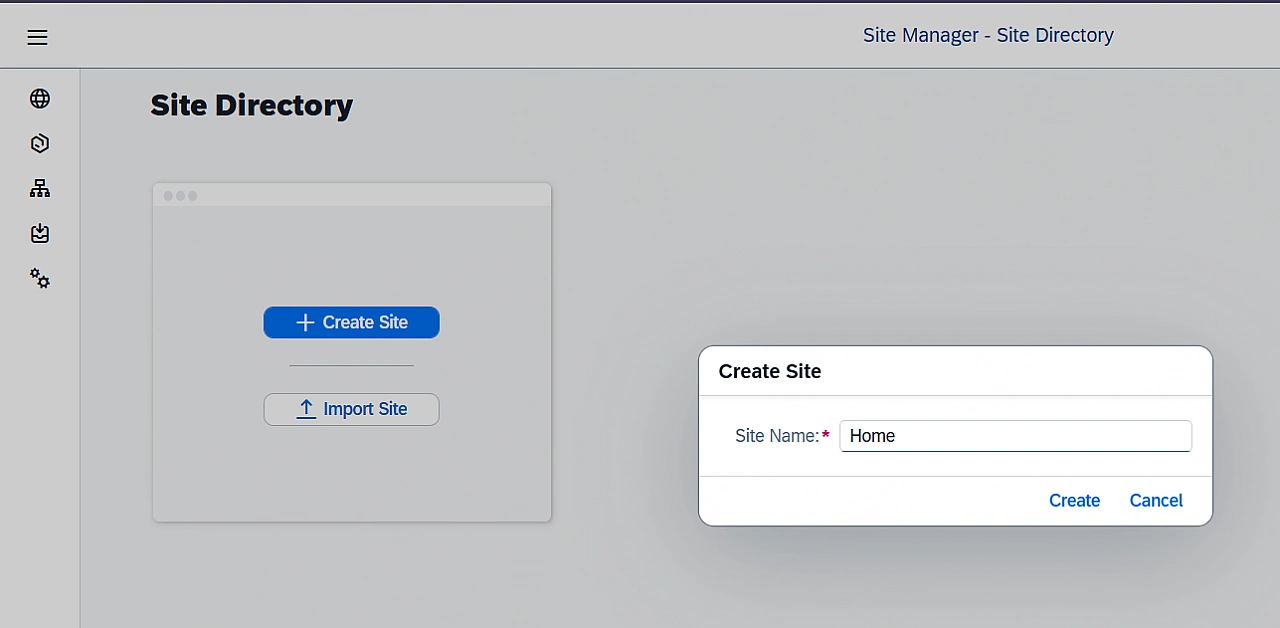
Once the site is created, you can navigate to it. You won't see any apps yet because we haven't assigned any.
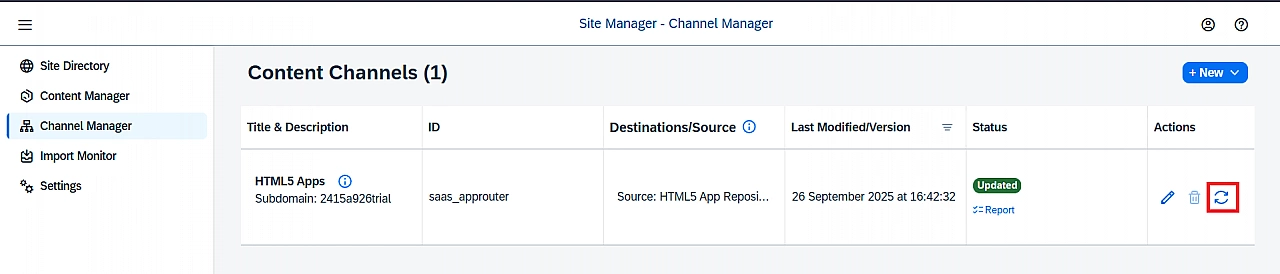
Open Channel Manager and refresh the HTML5 Apps. This is necessary for our application to appear and be available for assignment.
Open Content Manager and click on Content Explorer.

Select the HTML5 Apps channel, select our app, and click Add.

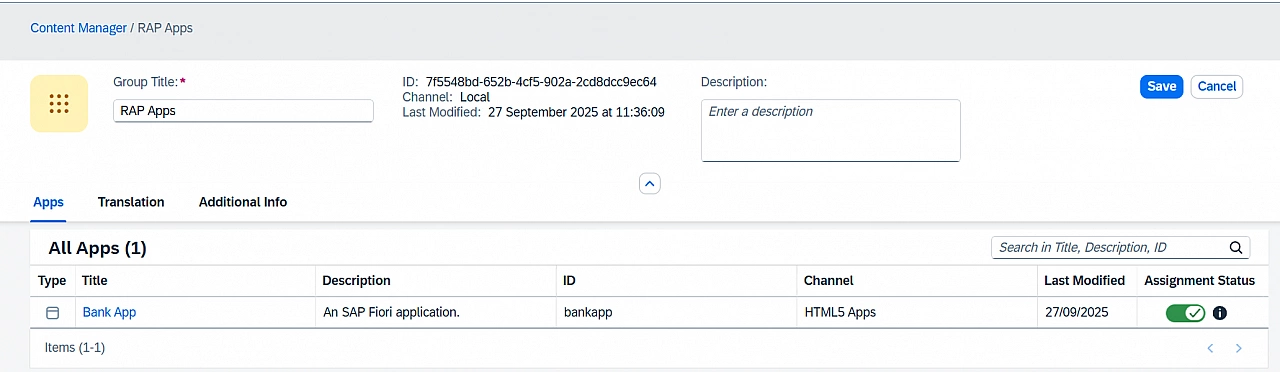
Go back to the Content Manager, create a new Group, enable the assignment of our deployed application, and save the group.
Once again, go back to Content Manager, open the Everyone role, edit it, assign our deployed application to the role, and save.

Now, open the site and check again.

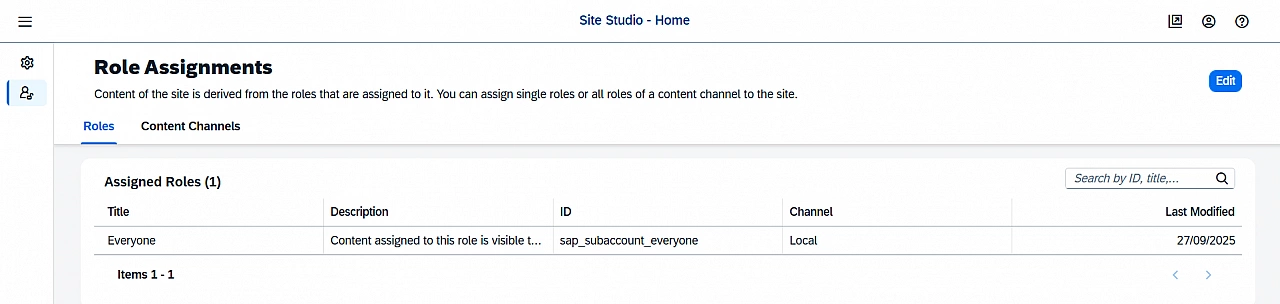
Did we just finish the whole tutorial? How did that happen? We didn't explicitly assign our app to the site.
If you go to the site's settings and check Role Assignments, you'll see that all apps under the Everyone role are automatically visible on our site.
Kudos!
Common Issues and How to Resolve Them
During the deployment process, you might encounter a few common roadblocks. Here are some of the issues I ran into and how I solved them.
-
Authorization Issues: When working on this blog, I did not start with a completely fresh account. I found that some old services and objects caused authorization problems when selecting the OData service.
Resolution: Using the booster for SAP Build Apps was the most effective solution, as it automatically created and configured any missing or leftover objects. Starting with a clean environment is always recommended. -
Incorrect Subscription: Make sure you are subscribed to SAP Build Apps, not SAP Build Code. Choosing the wrong service means the Custom Identity Service will not be subscribed, which can lead to various issues within BAS.
-
Role Assignment: Certain roles are not assigned automatically and must be added manually to your user. Please follow the steps in the blog carefully to ensure you have all the necessary permissions.
-
Finding BAS in SAP Build: The merger of SAP Business Application Studio (BAS) into SAP Build can make it difficult to find the BAS environment directly. Our workaround: We create a simple, dummy project in SAP Build to reach the BAS environment.
-
App Not Appearing in SAP Build Work Zone: If your deployed app isn't showing up on your site, it's likely a matter of step order. It took me a while to realize this, but following the steps in the correct sequence as outlined in the blog will prevent this issue.
Thanks for reading!